When you′re new to the whole project management concept it′s very easy to get lost in the amount of jargon, new concepts and the plethora of complicated PM methodologies.
Here are 5 simple steps to create and plan your first project. We′ll use a sample project of creating and delivering a training course to illustrate these steps.
Step 1: Define Key Parameters
The first step in your project planning process should be creating a “shell” for your project – its structure. Start by giving a good descriptive name to your project, define its goals and objectives and choose the team that will be working on it.
Keep in mind that none of it is set in stone and might change as your project progresses.
We recommend not to specify project end date manually since the tasks that we will create later will automatically set the project deadline.
Step 2: Identify Major Milestones
For the purpose of this post let′s consider Milestone to be a task, completion of which indicates significant progress towards the end of the project.
We have a dedicated blog post explaining in more details on how to use milestones in a project:
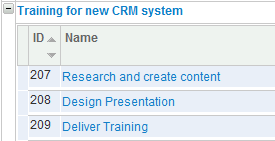
In our example we′ll have 3 milestones:
- Research and create content
- Design presentation
- Deliver training
Same as with our project, let′s leave the deadlines for the milestones empty.
Step 3: Add Sub-tasks with Durations and Timelines
So far we′ve created a skeleton for our project. Now it′s time to add some meat to it.
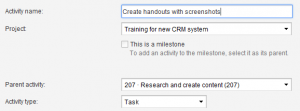
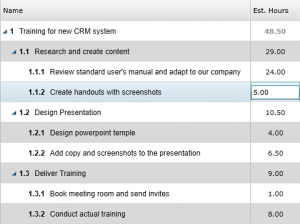
We′ll create tasks (steps), required to complete each milestone. In addition to the name and description, we also recommend adding start dates along with the duration in business days for each task. Also, it might be useful to also specify estimated number of hours required to complete each task. It will help you track progress and allow you to be more accurate in the future by having a history of estimated vs. actual hours for the completed projects.
We recommend that the estimated time to complete each task should not exceed 16-20 hours. Otherwise, it can be rather difficult to provide an accurate estimation. If it does exceed 20 hours – split it into sub-tasks. This way you will have better control over the progress.
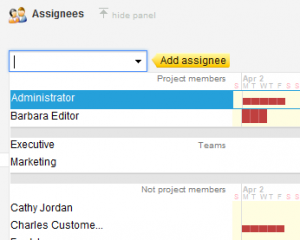
Now let′s choose who will be responsible for each of the tasks. We recommend that you don′t assign people to the milestones and only to the sub-tasks.
Sometimes it makes sense to have multiple assignees for a task in case people will be sharing the workload, however, if you want to be more granular in terms of the progress and responsibilities, then go with a single assignee per task.
You can also assign (book) shared resources like a projector at this step.
Step 5: Specify Dependencies
At this point, we know all the tasks for our project, their duration and who will be working on them. In certain cases, it makes sense to use dependencies.
Dependencies are particularly useful when the delays in one task can delay others and you want to be able to quickly recalculate the entire project schedule when one of the tasks slips.
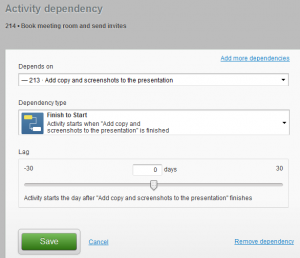
In our example, you cannot add content and screenshots to the presentation if the template is not ready yet.
Please note that once you introduce the dependencies, some of the previously defined dates might shift.
In this example, we′ll be using the simplest single “Finish to Start” dependency, however, keep in mind that there other types that might be really useful under certain circumstances e.g. if you need to plan your project backward from a deadline.
Now we have our complete project schedule with correct dates, durations, and assignees.
Congratulations, your project is ready! Next time we′ll talk about tracking its progress.
Photo by Hanna Morris on Unsplash
Follow us

